Showing posts with label Windows Workstations XP/Vista/7/8. Show all posts

Monday, 18 August 2014

How to fix “library-ms no longer working” error

How to fix “library-ms no longer working” error in Windows 7

This error happens if there was a corruption on registry due to improper shutdown of the computer.

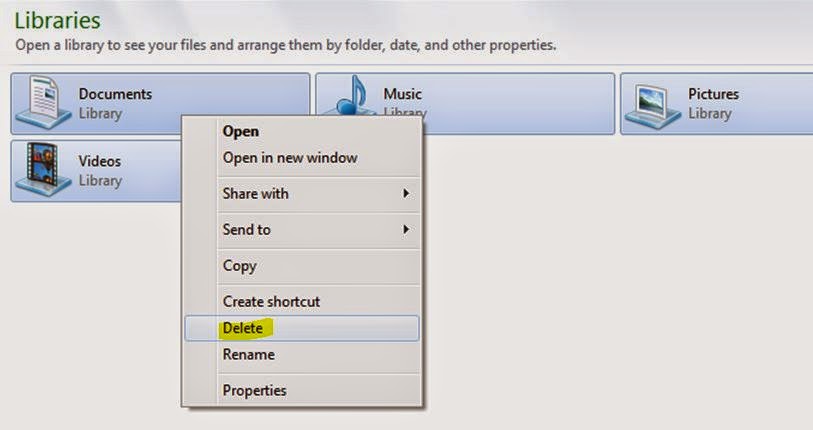
 Right click on the corrupted icons inside the Libraries folder and delete it.
 Once the corrupted icons are deleted, right click on the Libraries and Restore default libraries. Once restored the icons will be good to use again.

Friday, 21 March 2014

How can you determine what GPO was and was not applied for a user in a Windows AD Domain.

start->Run->cmd-> type

gpresult /?


gpresult /R
By using the /R switch with nothing else, summary data for the various policies and settings will be printed to your command prompt.

gpresult /V
This is the same as the /R command, only the results will be verbose

 GPRESULT /R

 GPRESULT /H GPReport.html
 GPRESULT /USER targetusername /V
 GPRESULT /S system /USER targetusername /SCOPE COMPUTER /Z
 GPRESULT /S system /U username /P password /SCOPE USER /V

Wednesday, 29 January 2014

PSTools to Access remote computer on the network

PSTools to Access remote computer on the network.
Download the PSTools
Extract the file into your C drive as C:\PSTools\
From the command promt go to the C:\PSTools\
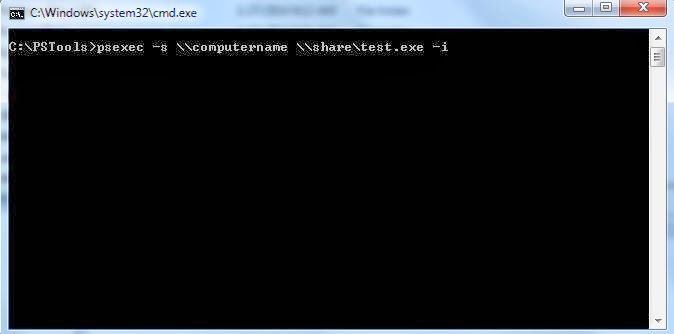
To access a remote computer on the network you can use the tool PsExec.exe

Wednesday, 18 December 2013

Windows XP could not start because the following file is missing or corrupt: \WINDOWS\SYSTEM32\CONFIG\SYSTEM

Insert the Windows XP startup disk into the floppy disk drive, or insert the Windows XP CD-ROM into the CD-ROM drive, and then restart the computer.
At the Recovery Console command prompt, type the following lines, pressing ENTER after you type each line:

md tmp
copy c:\windows\system32\config\system c:\windows\tmp\system.bak
copy c:\windows\system32\config\software c:\windows\tmp\software.bak
copy c:\windows\system32\config\sam c:\windows\tmp\sam.bak
copy c:\windows\system32\config\security c:\windows\tmp\security.bak
copy c:\windows\system32\config\default c:\windows\tmp\default.bak

delete c:\windows\system32\config\system
delete c:\windows\system32\config\software
delete c:\windows\system32\config\sam
delete c:\windows\system32\config\security
delete c:\windows\system32\config\default

copy c:\windows\repair\system c:\windows\system32\config\system
copy c:\windows\repair\software c:\windows\system32\config\software
copy c:\windows\repair\sam c:\windows\system32\config\sam
copy c:\windows\repair\security c:\windows\system32\config\security
copy c:\windows\repair\default c:\windows\system32\config\default

Type exit to quit Recovery Console. Your computer will restart.

http://support.microsoft.com/kb/307545/en-us

Error message that you receive when you restart a Windows XP-based computer: "lsass.exe unable to locate component"

To resolve this problem, follow these steps:
  1. Insert the Windows XP disk in the CD drive or DVD drive on the computer. Press and hold down the SHIFT key as you insert the disk to prevent the Windows XP installation from automatically starting.
  2. Click Start, click Run, type the following command, and then click OK:
    expand CD drive:\i386\ntdsapi.dl_ %SystemRoot%\windows\system32\ntdsapi.dll
  3. Click Start, click Run, type cmd, and then click OK.
  4. At the command prompt, type the following command, and then press ENTER: xcopy c:\windows\servicepackfiles\i386\ntdsapi.dll c:\windows\system32

    Thursday, 5 December 2013

    PST Repair for Outlook 2003/2007

    PST repair in Outlook 2003.
    The PST repair tool can be found on C:\Program Files\Common Files\system\MSMAPI\1003\
    This tool is used if the pst file is corrupted or to fix a pst file size after deleting emails from your outlook. Sometimes even after deleting files/ email from your outlook the size of the pst stay the same. So in that case run the scanpst.exe tool and scan the pst files.


    Wednesday, 4 December 2013

    Change the temporary folder for Outlook 2003, which is used to save attachments

    Outlook 2003 If you are using Outlook 2003, follow these steps: Create a folder under your profile and name it temp, then change the registry settings for Outlook to point the temp files to this folder Click Start, click Run, type regedit, and then click OK. Locate and then click the following registry key: HKEY_CURRENT_USER\Software\Microsoft\Office\11.0\Outlook\Security\ In the right pane, double-click OutlookSecureTempFolder. In the Value Data field, type C:\users\username\temp\ and then click OK. Exit Registry Editor, restart the computer. http://support.microsoft.com/kb/305982

    Tuesday, 12 November 2013

    NSLOOKUP(name server look up) through a given server

    nslookup is command-line tool for querying the Domain Name System (DNS) to obtain domain name or IP addressmapping or for any other specific DNS record

    Syntax:
    C:\Users\User1>nslookup ?
    Usage:
       nslookup [-opt ...]             # interactive mode using default server
       nslookup [-opt ...] - server    # interactive mode using 'server'
       nslookup [-opt ...] host        # just look up 'host' using default server
       nslookup [-opt ...] host server # just look up 'host' using 'server'

    nslookup can be used to find the query using a different server than the default dns server.

    >nslookup forexample.com 8.8.8.8 - here the 8.8.8.8 is the public google dns.

    Friday, 18 October 2013

    How to add a route of a destination ip when you have multiple network cards or gateway


    route -p ADD <Destination> MASK 255.255.255.255 <Gateway> 

    eg: route -p ADD 192.168.1.0 MASK 255.255.255.0 192.168.10.1
    In this case the route looking for 192.168.1.0 network will pass through the gateway 192.168.10.1
    route print - To display the entire contents of the IP routing table.
    route delete 192.168.1.0 mask 255.255.255.0

    Thursday, 17 October 2013

    How To Empty the Clipboard memory in Windows 7

    When ever you copy/ cut a word from a document its stored in the clipboard of the windows xp/7. After some times when the memory is full you cannot copy anymore. You will have to clear the items from the clipboard. To clear use the following command.

    Also you can create a shotcut of the command


    Thursday, 10 October 2013

    How to Change the Default fonts on Outlook 2003

    Go to Tools->Options on your Outlook 2003/2007. There you will see the Mail Format Tab, under that open Fonts, there you have options to change the fonts. Once you changed the fonts please close and open the outlook.


    Thursday, 3 October 2013

    Make Windows 7 Search files from the mapped or network drives

    1. Click the Start button and type in Windows searches.
    2. Click on Change how Windows searches.
    3. Now click on the Advanced button and select the File types tab.
    4. Scroll down and locate your file type and make sure that the radio button Index Properties and File  Contents is selected for the file type you are trying to find.
    Once this is done the windows search will do an indexing of all the files on your computer or mapped folder. 


    Tuesday, 1 October 2013

    VPN Client access on Cisco Router

    Setting up a VPN client access on RV042 Cisco router
    Login to the router from the browser, go to VPN, VPN Client Access. Add a new client
    Enter a username and password for the VPN Client and make it active.
    Generate a certificate and download it for the client, once this is done save it.
    Copy the downloaded certificate file into the Quick VPN Client installation folder.

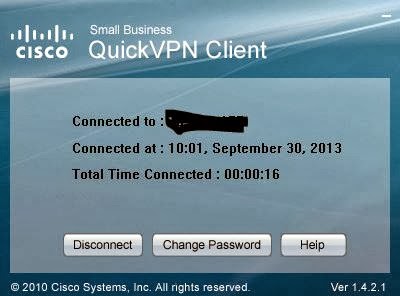
    Please enter the created username and password. Also the public ip on the Cisco router and press connect.


    Once the connection is active you can monitor it on the VPN summary on the router.


    http://software.cisco.com/download/release.html?mdfid=282414013&softwareid=282465795&release=1.4.2.1

    Thursday, 26 September 2013

    Add a network printer from a Print Server without user interaction in Windows xp/7

    You can create a batch file and add it to run at login.
    Batch file to add a network printer
    RUNDLL32 PRINTUI.DLL,PrintUIEntry /in /n \\network_server\shared_printer_name
    To Delete the network printer from the computer
    RUNDLL32 PRINTUI.DLL,PrintUIEntry /dn /n \\network_server\shared_printer_name

    Usage: rundll32 printui.dll,PrintUIEntry [options] [@commandfile]
       /a[file] binary file name
       /b[name] base printer name
       /c[name] unc machine name if the action is on a remote machine
       /dl delete local printer
       /dn delete network printer connection
       /dd delete printer driver
       /e display printing preferences
       /f[file] either inf file or output file
       /F[file] location of an INF file that the INF file specified with /f may depend on
       /ga add per machine printer connections (the connection will be propagated to the user upon logon)
       /ge enum per machine printer connections
       /gd delete per machine printer connections (the connection will be deleted upon user logon)
       /h[arch] driver architecture one of the following, x86 or x64 or Itanium 
       /ia install printer driver using inf file
       /id install printer driver using add printer driver wizard
       /if install printer using inf file
       /ii install printer using add printer wizard with an inf file
       /il install printer using add printer wizard
       /in add network printer connection
       /ip install printer using network printer installation wizard
       /j[provider] print provider name
       /k print test page to specified printer, cannot be combined with command when installing a printer
       /l[path] printer driver source path
       /m[model] printer driver model name
       /n[name] printer name
       /o display printer queue view
       /p display printer properties
       /q quiet mode, do not display error messages
       /r[port] port name
       /s display server properties
       /Ss Store printer settings into a file
       /Sr Restore printer settings from a file
       Store or restore printer settings option flags that must be placed at the end of command:
    2 PRINTER_INFO_2
    7 PRINTER_INFO_7
    c Color Profile
    d PrinterData
    s Security descriptor
    g Global DevMode
    m Minimal settings
    u User DevMode
    r Resolve name conflicts
    f Force name
    p Resolve port
    i Driver name conflict
       /u use the existing printer driver if it's already installed
       /t[#] zero based index page to start on
       /v[version] driver version one of the following, "Type 2 - Kernel Mode" or "Type 3 - User Mode"
       /w prompt the user for a driver if specified driver is not found in the inf
       /y set printer as the default
       /Xg get printer settings
       /Xs set printer settings
       /z do not auto share this printer
       /Y do not auto generate a printer name
       /K changes the meaning of /h to accept 2,3,4 for x86 or x64 or Itanium and /v to accept 3 for "Type 3 - User Mode"
       /Z share this printer, can only be used with the /if option
       /? help this message
       @[file] command line argument file
       /Mw[message] show a warning message before committing the command
       /Mq[message] show a confirmation message before committing the command
       /W[flags] specifies flags and switches for the wizards (for APW & APDW)
    r make the wizards to be restart-able from the last page
       /G[flags] specifies global flags and switches
    w suppress setup driver warnings UI (super quiet mode)

    Examples:
       Run server properties:
    rundll32 printui.dll,PrintUIEntry /s /t1 /c\\machine
       Run printer properties:
    rundll32 printui.dll,PrintUIEntry /p /n\\machine\printer
       Run add printer wizard locally:
    rundll32 printui.dll,PrintUIEntry /il
       Run add printer wizard on \\machine:
    rundll32 printui.dll,PrintUIEntry /il /c\\machine
       Run queue view:
    rundll32 printui.dll,PrintUIEntry /o /n\\machine\printer
       Run inf install:
    rundll32 printui.dll,PrintUIEntry /if /b "Test Printer" /f c:\infpath\infFile.inf /r "lpt1:" /m "Brother DCP-128C"
       Run inf install (with inf dependency). In the example, prnbr002.inf depends on ntprint.inf
    rundll32 printui.dll, PrintUIEntry /ia /m "Brother DCP-128C" /K /h x64 /v 3 /f "c:\infpath\prnbr002.inf" /F "c:\infpath\ntprint.inf"
       Run add printer wizard using inf:
    rundll32 printui.dll,PrintUIEntry /ii /f c:\infpath\infFile.inf
       Add printer using inbox printer driver:
    rundll32 printui.dll,PrintUIEntry /if /b "Test Printer" /r "lpt1:" /m "Brother DCP-128C"
       Add per machine printer connection (the connection will be propagated to the user upon logon):
    rundll32 printui.dll,PrintUIEntry /ga /c\\machine /n\\machine\printer /j"LanMan Print Services"
       Delete per machine printer connection (the connection will be deleted upon user logon):
    rundll32 printui.dll,PrintUIEntry /gd /c\\machine /n\\machine\printer
       Enumerate per machine printer connections:
    rundll32 printui.dll,PrintUIEntry /ge /c\\machine
       Add printer driver using inf:
    rundll32 printui.dll,PrintUIEntry /ia /c\\machine /m "Brother DCP-128C" /h "x86" /v "Type 3 - User Mode" /f c:\infpath\infFile.inf
       Add printer driver using inf:
    rundll32 printui.dll,PrintUIEntry /ia /K /c\\machine /m "Brother DCP-128C" /h "x86" /v 3
       Add inbox printer driver:
    rundll32 printui.dll,PrintUIEntry /ia /c\\machine /m "Brother DCP-128C" /h "Intel" /v "Type 3 - Kernel Mode"
       Remove printer driver:
    rundll32 printui.dll,PrintUIEntry /dd /c\\machine /m "Brother DCP-128C" /h "x86" /v "Type 3 - User Mode"
       Remove printer driver:
    rundll32 printui.dll,PrintUIEntry /dd /K /c\\machine /m "Brother DCP-128C" /h "x86" /v 3
       Set printer as default:
    rundll32 printui.dll,PrintUIEntry /y /n "printer"
       Set printer comment:
    rundll32 printui.dll,PrintUIEntry /Xs /n "printer" comment "My Cool Printer"
       Get printer settings:
    rundll32 printui.dll,PrintUIEntry /Xg /n "printer"
       Get printer settings saving results in a file:
    rundll32 printui.dll,PrintUIEntry /f "results.txt" /Xg /n "printer"
       Set printer settings command usage:
    rundll32 printui.dll,PrintUIEntry /Xs /n "printer" ?
       Store all printer settings into a file:
    rundll32 printui.dll,PrintUIEntry /Ss /n "printer" /a "file.dat"
       Restore all printer settings from a file:
    rundll32 printui.dll,PrintUIEntry /Sr /n "printer" /a "file.dat"
       Store printer information on level 2 into a file :
    rundll32 printui.dll,PrintUIEntry /Ss /n "printer" /a "file.dat" 2
       Restore  from a file printer security descriptor:
    rundll32 printui.dll,PrintUIEntry /Sr /n "printer" /a "file.dat" s
       Restore  from a file printer global devmode and printer data:
    rundll32 printui.dll,PrintUIEntry /Sr /n "printer" /a "file.dat" g d
       Restore  from a file minimum settings and resolve port name:
    rundll32 printui.dll,PrintUIEntry /Sr /n "printer" /a "file.dat" m p
       Enable Client Side Rendering for a printer:
    rundll32 printui.dll,PrintUIEntry /Xs /n "printer" ClientSideRender enabled
       Disable Client Side Rendering for a printer:
    rundll32 printui.dll,PrintUIEntry /Xs /n "printer" ClientSideRender disabled

    Tuesday, 24 September 2013

    How to Enable Remote desktop on Windows XP/7

    To enable remote desktop, open System from the control panel or right click on My Computer, Properties. Go to Remote settings
    In Windows 7


    In Windows XP 


    Tuesday, 17 September 2013

    Enable Concurrent Desktop Sessions in Windows Workstation edition

    In windows workstation editions like Windows 7, Vista or 8 you can have only one remote desktop session at a time. In some cases its better to have another persion login to your computer and use it on a different desktop. This can be done by downloading and installing  Universal Termsrv.dll Patch.
    Select the x86 or x64 version of the patch and run as administrator. Once its done restart the computer.


    to uninstall the rename the .backup file and delete the other file under C:\Windows\System32


    Tuesday, 10 September 2013

    Monitoring an application with powershell script

    This will help you to create a powershell script to check a running application. If the application is running you will receive an email and if its not running powershell script will start the application. You can copy and make the necessary changes to it and run it with power shell, also you can run it as a scheduled task. Save the script as "anyname.ps1". In this example i am trying to see Outlook is running.


    $process = Get-Process -Name "outlook"
    $date = Get-Date
    if (!$process){
    {$_.running -eq $false}
        & "C:\Program Files (x86)\Microsoft Office\OFFICE11\outlook.exe"
    }
    else {

    $emailSmtpServer = "smtp.gmail.com"
    $emailSmtpServerPort = "587"
    $emailSmtpUser = "youremailidhere@gmail.com"
    $emailSmtpPass = "yourgmailpasswordhere"

    $emailFrom = "youremailidhere@gmail.com"
    $emailTo = "youremailidhere@gmail.com"

    $emailMessage = New-Object System.Net.Mail.MailMessage( $emailFrom , $emailTo )
    $emailMessage.Subject = "Computer started with Axis"
    $emailMessage.IsBodyHtml = $true
    $emailMessage.Body = @"
    <p>type a message here for you to see on your email.</p>
    <p>starting Outlook $date</p>
    "@

    $SMTPClient = New-Object System.Net.Mail.SmtpClient( $emailSmtpServer , $emailSmtpServerPort )
    $SMTPClient.EnableSsl = $true
    $SMTPClient.Credentials = New-Object System.Net.NetworkCredential( $emailSmtpUser , $emailSmtpPass );
    $SMTPClient.Send( $emailMessage )
    }

    Monday, 9 September 2013

    Port forwarding in Cisco Router RV042

    Login to the router from a web interface, if its the default ip(192.168.1.1) prompt for a username and password(default is admin/admin). Once logged in go to Setup, click on forwarding, there you can see the options to add a new service. The service we are adding is RDP for windows XP/7. 

     Once you click on the service, give a name "RDP" and the TCP port for the rdp in windows is 3389, provide as shown and then add to the list.
     Find the recently added RDP service then put the ip address where you want to forward the port to then add to list and enable it. Once its done save the settings. Once saved you can RDP  to 192.168.10.10 through the router RV042.


    How to Copy the Autocomplete Information to a New Outlook Profile

    In Outlook 2010 the best solution is to keep the same name(profile name) on the new computer. Once you keep the same name the auto complete will transfer by itself if you copy the "username.pst" file from the old computer(located c:\users\name of the user\documents\Outlook files) to the new.
    But in older versions of Outlook(2003/ 2007). there is a file named "Outlook.NK2" under the user profile
    In windows 7 (C:\Users\username\AppData\Roaming\Microsoft\Outlook\Outlook.NK2 or %APPDATA%\Microsoft\Outlook )
    In Windows XP (C:\Documents and Settings\username\Application Data\Microsoft\Outlook\Outlook.NK2) copy this file to the new profile.

     Import the Auto-Complete List

    You are now ready to start Outlook and import the file, but you must start Outlook with a special one-time command.
    Do one of the following:
    • Windows 7    Click Start {picture}. Next to the Shut down button, in the Search programs and files box, type outlook /importnk2 and then press Enter.
    • Windows Vista    Click Start {picture}. Next to the Shut Down button, in the Search box, type outlook /importnk2 and then press Enter.
    • Windows XP    Click Start {picture}, click Run, type outlook /importnk2 and then press Enter.
    If you want to export the .NK2 files into contact use the software from Nirsoft
    http://www.nirsoft.net/utils/outlook_nk2_edit.html

    Windows 7 logged into TEMP Profile

    This problem occurs if the current user is deleted or in a domain network the network is down to authenticate the login. In all the cases windows 7 create a temp profile for the user and the old or correct user is rename in the registry as .bak. So the only thing you have to do is to delete the user from the registry and takeout the .bak registry entry showing the username.

    Follow this step.
     1. Log on to the system by using an administrative user account other than the user account that is experiencing the problem.
    2. Click Start, type regedit in the Start Search box, and then press ENTER.
    If you are prompted for an administrator password or for confirmation, type your password, or click Continue.
    3.Locate the following registry subkey:
    HKEY_LOCAL_MACHINE\SOFTWARE\Microsoft\Windows NT\CurrentVersion\ProfileList
    4.Under the ProfileList subkey, delete the subkey that is named similar to SID.bak. and take out the .bak from the SID.bak registry file
    Note SID is a placeholder for the security identifier (SID) of the user account that is experiencing the problem. The SID.bak subkey should contain a ProfileImagePath registry entry that points to the original profile folder of the user account that is experiencing the problem.
    6. Exit Registry Editor.
    7. Log off the system.
    8. Log on to the system again.
    ,